If you are running a later version of FreePBX that includes Asterisk 12 and above with PJSIP you should follow this method.
If you get stuck and need assistance please contact our support department.
Login to your FreePBX control panel via the IP Address for your server, for example if you server uses the IP 192.168.1.50 enter http://192.168.1.50 in your web browser
Select Connectivity then Trunks
Select Add Trunk then select Add SIP (chan_pjsip) Trunk
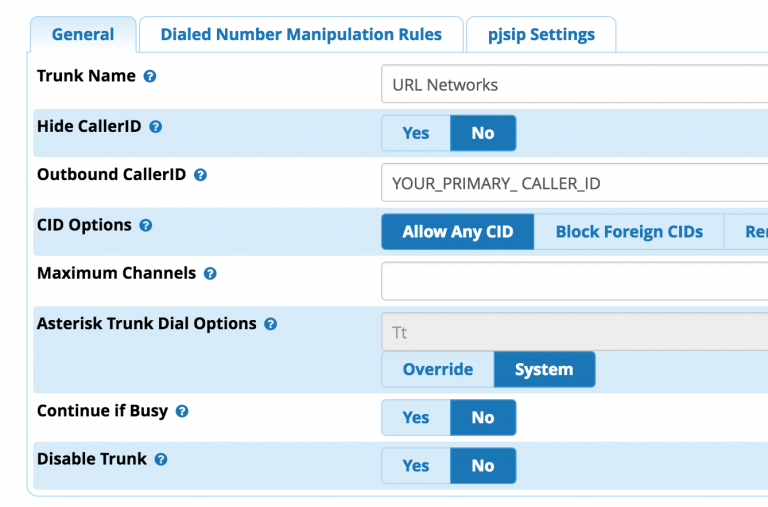
On the next screen enter the following:
Trunk Name: URL Networks
Outbound Caller ID: Set this to be your primary phone number (include the full country + area code. e.g. 61312341234)
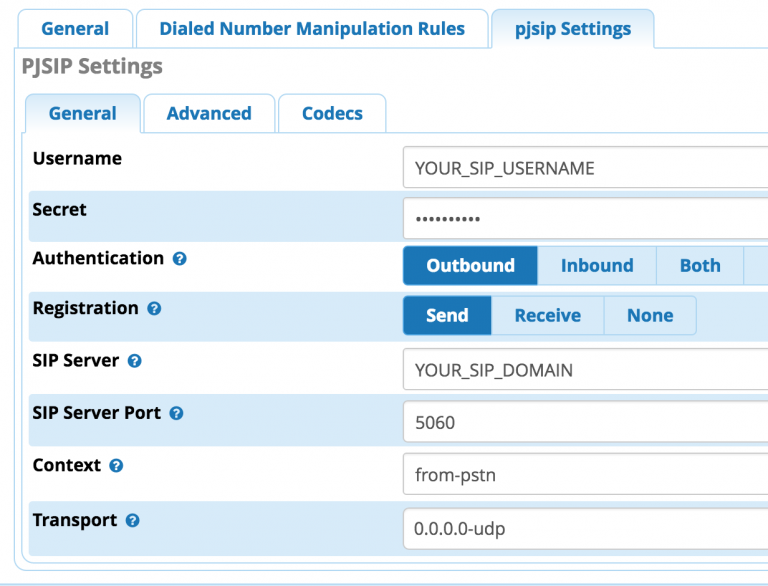
Next select pjsip Settings and enter the following
Username: Your SIP username, this will be in your account notification email or you can view it via our Dashboard.
Password: The SIP password for the account, this will be in your account notification email or you can view it via our Dashboard.
Authentication: Outbound
Registration: Send
SIP Server: Your SIP server address, this will be in your account notification email or you can view it via our Dashboard.
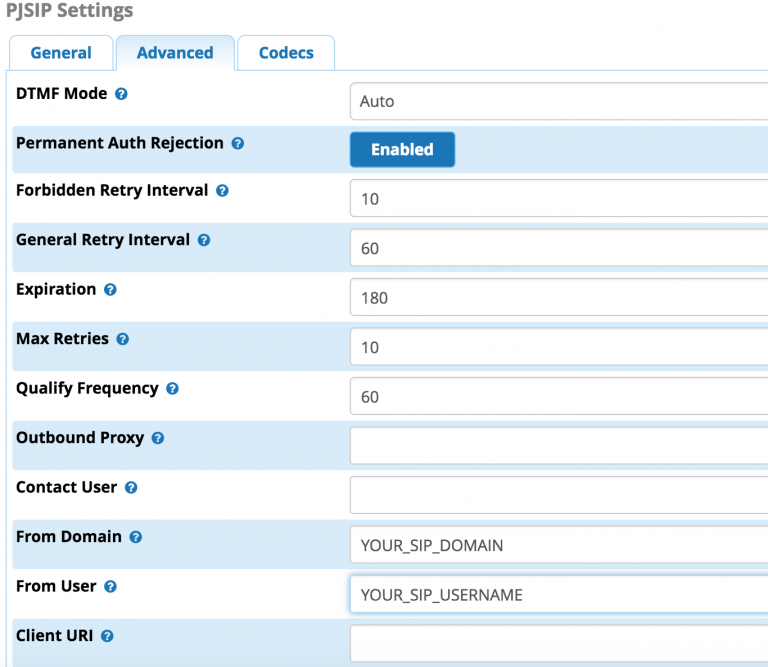
Select the Advanced tab and enter the following:
From Domain: The SIP Server used in the previous section