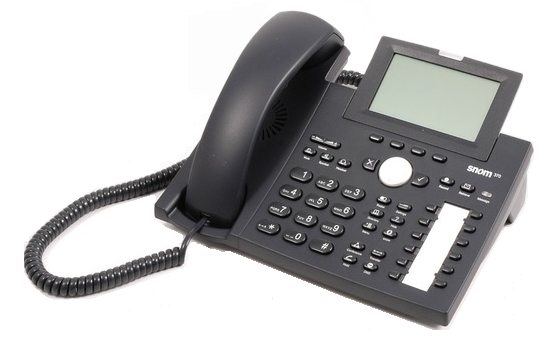
If your phone already has an existing configuration it might be best to factory reset it. To do so please follow these steps:
Push Settings on the phone
Use the direction pad to go to Maintenance or push 5
Use the direction pad to go to Reset Values or push 4
You will need to enter the Admin password. The default is 0000
Obtain IP Address
To obtain the IP address of the phone, follow these steps:
Push the button marked Settings on the phone
Use the down arrow button to select Maintenance and push the tick key to select
Use the tick key again on System Info and note the entry that says IP Adr:
Browsing to administration panel
Now that you know your IP Adr value open your web browser and enter http://IP Adr and push enter. For instance if your IP Adr was 192.168.0.10 enter http://192.168.0.10.
The default username is admin and the default password is admin.
If you have been successful you should see a login screen.
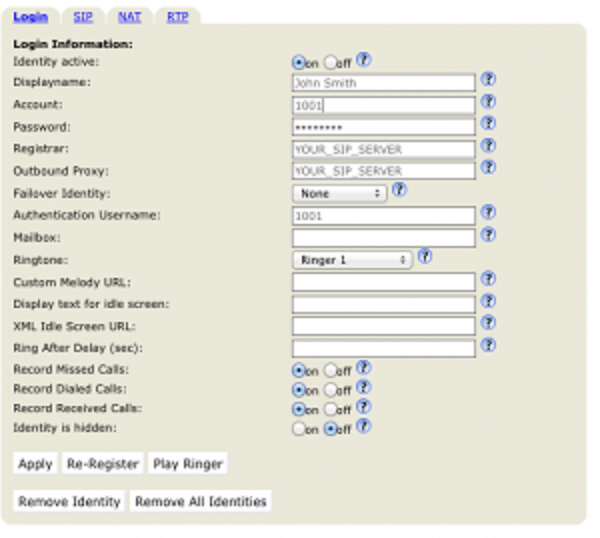
Configure Account
The next step is to configure the identity you want you account to use, in most cases this will be Identity 1. Select Identity 1 from the list.
On the Login tab set the following:
Display Name – Your name e.g. John Smith or Reception etc.
Account – The extension number you wish to use e.g. 1001
Password – The password for the extension
Registrar – Your SIP Server address
Outbound Proxy – Same as Registrar your SIP Server address
Authentication Username – Same as account the Extension number you wish to use
After your account is registered you need to assign a key for the account, If you wish you can assign multiple line keys to one account which can make it easier when you wish to put someone on hold and make another call.
Click Function keys from the menu on the left, select the button you want to assign to the first function key, in this case P1
Click the First dropdown and select your account
Click the second dropdown and select Line
Your button should now look similar to this:
Now click Save and you should be able to to receive an make calls.